How to Focus Stack in Landscape Photography
The advanced method of stacking multiple images will allow us to obtain a sharp foreground, midground, and background in landscape photography. Furthermore, this technique may require additional time in-camera and post-production; however, the result of added sharpness looks ideal in larger prints.
As mentioned previously, placing a subject in the extreme foreground and photographing with an ultra-wide lens makes it impossible to achieve completely sharp images. When there is such a significant distance between the foreground and background subject, we have to:
- Capture multiple photos. (2+)
- More is ALWAYS better.
- Merge in post-production.
Lastly, the in-camera settings compared to landscape photography do not differ. As a result, shooting at F/8, low native ISO and an S/S depending on the light source amount. Raising our aperture to F/22 or higher will harm the image, causing less sharpness, dust spots to appear and diffraction.
In conclusion, the best way is to focus stack your images – let’s find out how!
What is Focus, Stacking?
Firstly, Focus Stacking is an effective photography technique, combining an in-camera system and a post-processing software such as Helicon Focus. As a result, focus stacking multiple images a commonly used method used in the niche of landscape and macro photography.
Secondly, the technique involves capturing multiple (two or more) images with different focal points. An exact demonstrated of this method will be showcased later in greater detail.
Landscape Photography Focus Stacking Tutorial
Learn how “focus stacking in Landscape Photography” works and understand how it can take your images to an entirely NEW level. In modern photography, it’s becoming more challenging to get the entire picture in focus. This blog will cover how to achieve sharp images through your images, both in-camera and using Helicon Focus in Post-production.
Furthermore, numerous wider lenses by numerous companies and photographers are pushing the boundaries for more extreme foregrounds. However, focus stacking in landscape photography is a required skill and a go-to technique for many photographers of all levels.
Focus Stacking for Beginners
When Should I Focus Stack?
A compelling technique but not always necessary, let’s look at some scenarios when focus stacking is beneficial for the final image:
- Ultra wide-angle lens (14-20mm 35mm equivalent)
- Considerable distance between the foreground and background
- Generally, all macro images.
- Telephoto photography with a considerable distance between foreground and background
- Zooming in on a scene, such as a forest, and you want everything to be sharp even with an open aperture.
Firstly, these are scenarios where stacking focused images would benefit the picture by having everything in focus. However, this entirely depends on personal preference, sometimes adding a part of the photos not in focus creates depth or perspective in the image.
Evaluate each situation and composition depending on what you’re trying to achieve for the final result.
PRO TIP: Capture a test image, and then zoom in as far as you can on your camera screen to see if or when the sharpening fades off. Identify if and how many exposures you’ll need to blend for a sharp image.
How to Focus Stack
It’s all good and well to know what is focus stacking, but how does it work? Firstly, I’ve declared this as an “advanced” technique, but it’s not as tricky as it sounds. Therefore, we will cover the critical points in the camera before going over the post-processing techniques.
Adjusting the Focus Point
Focusing on focus stacking is a significantly critical aspect of the procedure, hence the name. Focusing manually or automatically will produce the same results, it heavily depends on your standard method.
Taking the images in a sequence will heavily improve your workflow, especially in post-production. As a result, capture the nearest foreground image and work your way to the background. However, remember every focus stack will range from 2+ images.
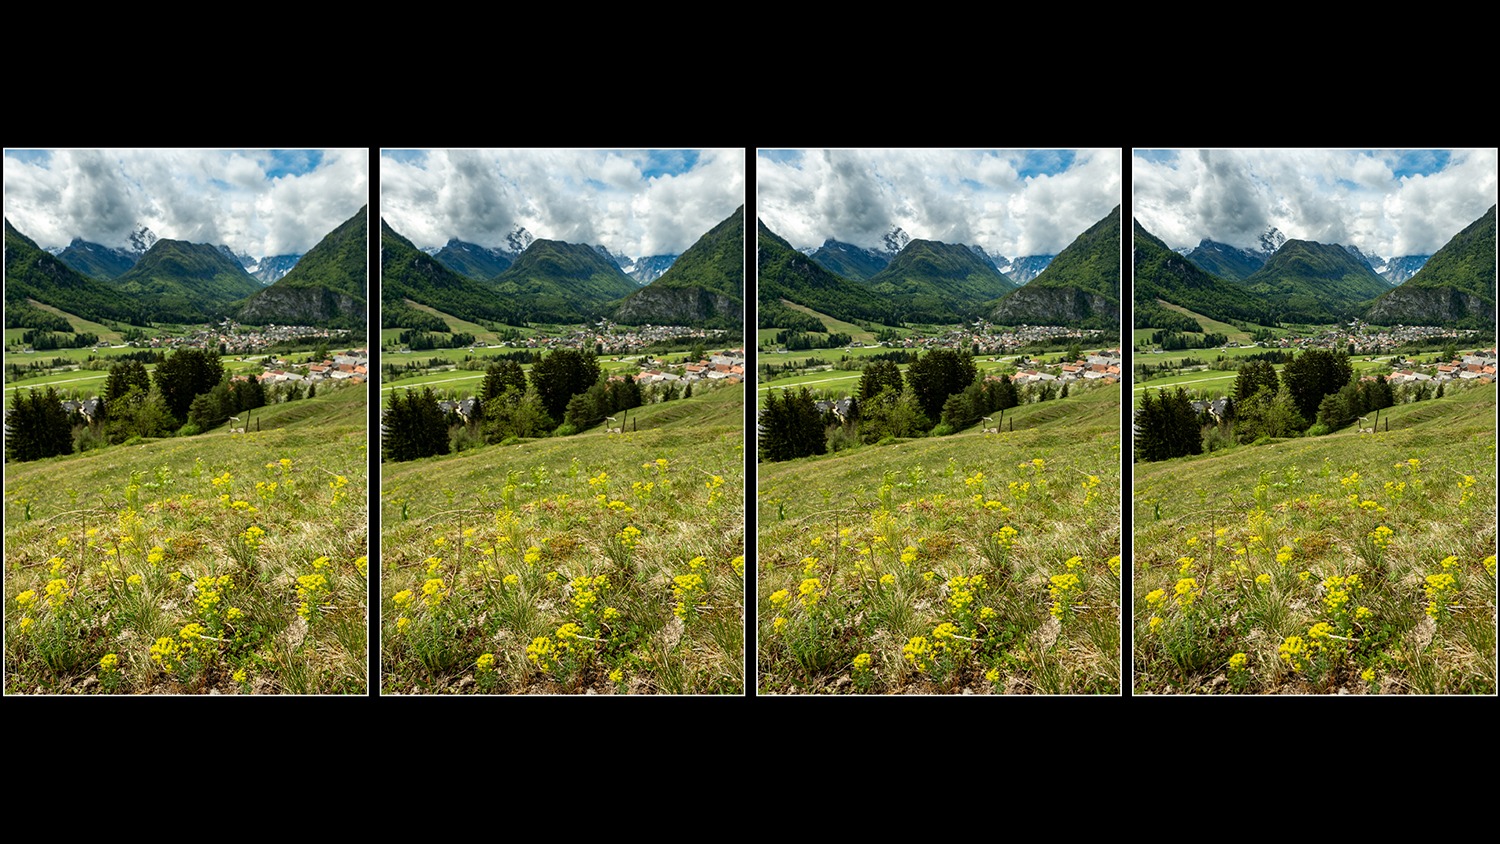
Below is a sequence of images required to focus stack the scene from the flowers in the extreme foreground, the mountains in the background. However, it’s impossible to determine where the location of the focus points are in the image.
DOWNLOAD THE RAW FILES HERE TO PRACTISE!!!

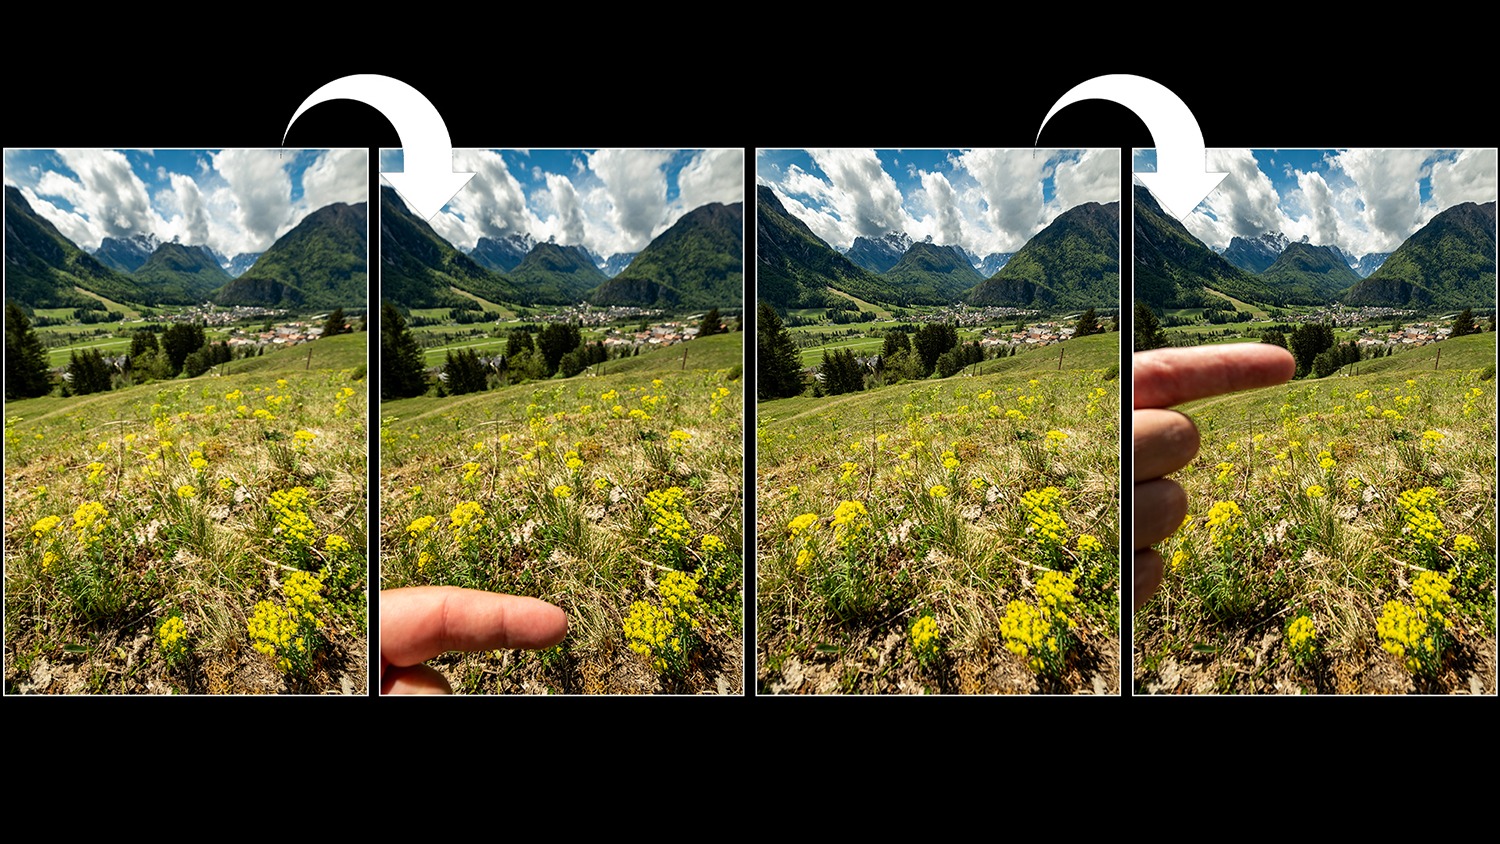
Therefore, below you’ll see that I’ve captured double the amount of required images. Furthermore, I’ve placed my finger separating the photos, indicating where the focus point is on the scene.

Landscape Photography Focus Stacking
There you have the in-camera techniques, simple right? Let’s just quickly recap the uncomplicated process required.
- Find a composition
- Use a tripod (Highly recommend)
- Focus on the subject (Foreground to background)
- Capture the image.
- Place finger in front of the camera, capture another image to display focus point for future reference.
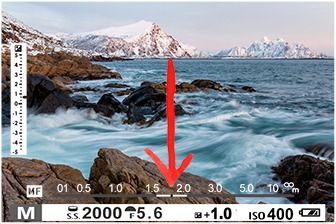
- Adjust focus for next image (Utilise focus peaking if camera feature)
- Repeat steps 4 & 5 until you have enough focused images from foreground to background.

If you're unsure how many images to capture to focus stack and try two techniques on a practice shoot.
- Capture images and zoom in on the camera LCD to check focus. Go with your gut feeling, then check on the computer at home to see if you’ve taken enough.
- Use focus peaking if your camera has this feature. Therefore, overlap the focus peaking display to assure you’ve got all the information required.
PRO TIP: Capture additional images than you require; more pictures is better than not enough!
Focus Stacking in Post-Production
Finally, after capturing all the information in-camera from out in the field, it’s time to learn how to create stunning focus stacked images in post-production. Firstly, I will show you step-by-step how to blend the photoshop images, although this method can become confusing. Therefore, I wish to show you the simplest and most effective way of using software called Helicon focus.
Focus Stacking in Adobe Photoshop
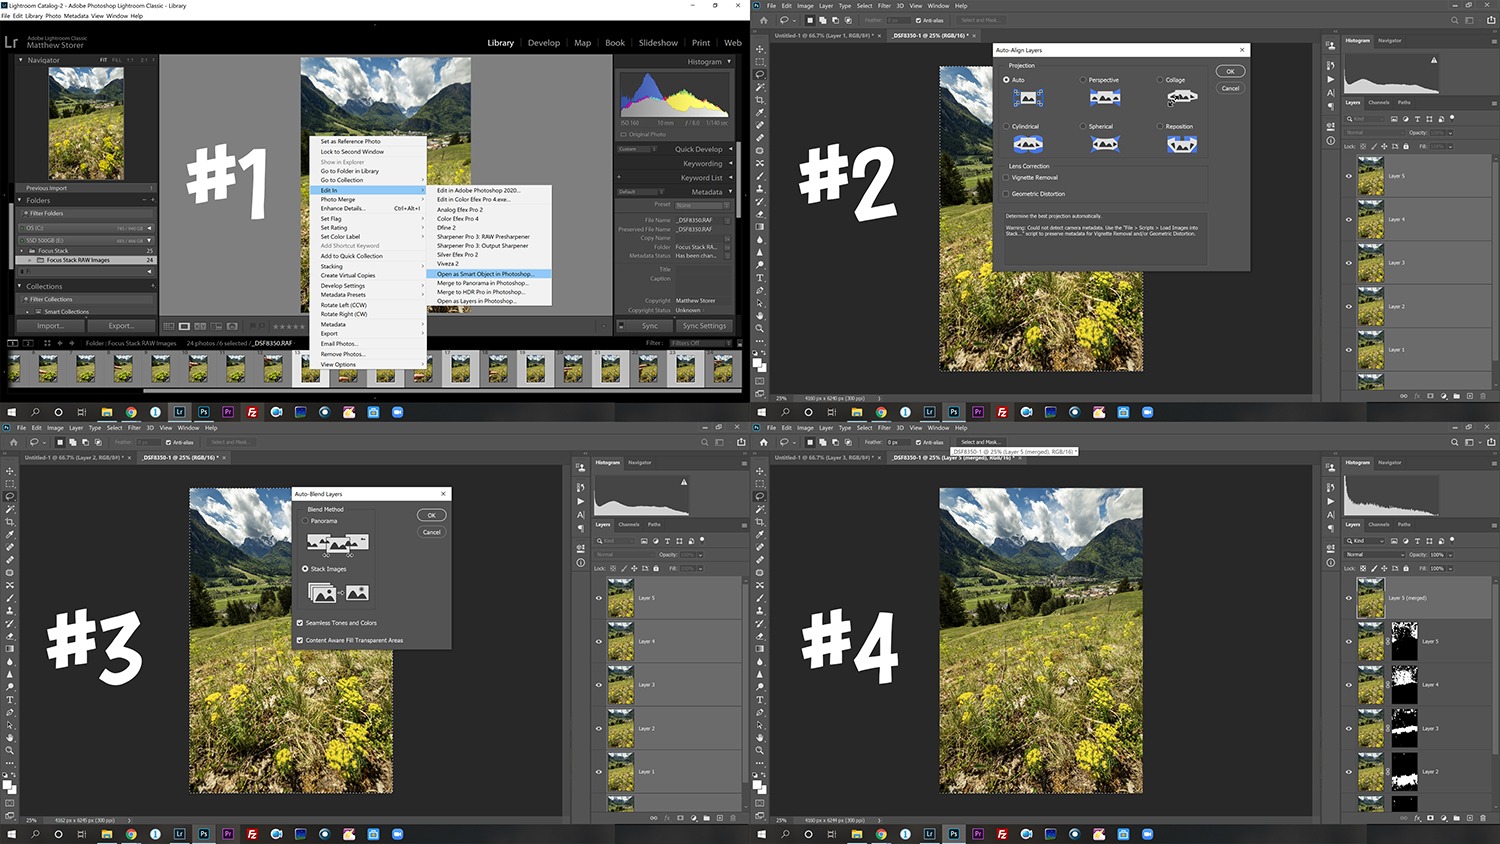
- Open all the images as Layers in Photoshop.
- If you use Lightroom, select all photos and choose Edit in-> Open as Layers in Photoshop.
- With all layers set ‘click’ Edit -> Auto-Align Layers
- ‘Click’ Edit -> Auto-Blend Layers.
- Photoshop will now automatically blend the image.
- Zoom into 100% and check the result.
Please Note: There are generally unsharp areas as a result of photoshop stitching the images. Therefore, create a merged layer and add a new layer mask (white). Furthermore, select a black brush and paint in the affected areas.
In conclusion, this is the best free software (if you own Adobe Photoshop); however, I never use this technique due to the result. As a result, I use Helicon Focus software, dedicated to focusing stacking images with exceptional results.

Helicon Focus - The BEST Focus Stacking software
Helicon Focus is the best and a go-to software for many professional photographers when focus stacking their images.
A complete beginner could use helicon focus on their first attempt without any issue as the software is straightforward. Firstly, if you use Adobe Lightroom such as myself, you can export directly to Helicon Focus.
- Import images into Adobe Lightroom
- Make alterations to the image as needed and apply to all images.
- Select images you wish to stack in Helicon Focus.
- Right-click -> Export -> Helicon Focus.
- Helicon Focus will load all images, select the ‘Render’ button on the top toolbar.
- Images will automatically stack together.
Finally, if Helicon Focus didn’t do a perfect job, there is a ‘Retouching” tab on the top panel. The focus-stacked image will display on the right side of the screen. Furthermore, the screen's left-hand side will show only one of the pictures you’ve selected from the focus stacked images. (all the original photos displayed on the right-hand side, here you can manually select the image you wish to merge into the final result manually)
Below’s video shows how simple and easy it is to blend images in Helicon Focus – Download FREE trial here!
In Conclusion
Focus stacking images is a useful technique to know and understand, especially for landscape photographers and almost required for macro photographers. Therefore, I recommend you download the photos below that I capture on my vlog about focus stacking to practice. Additionally, by clicking here, you can have a 30 day FREE trial of Helicon Focus to use.
